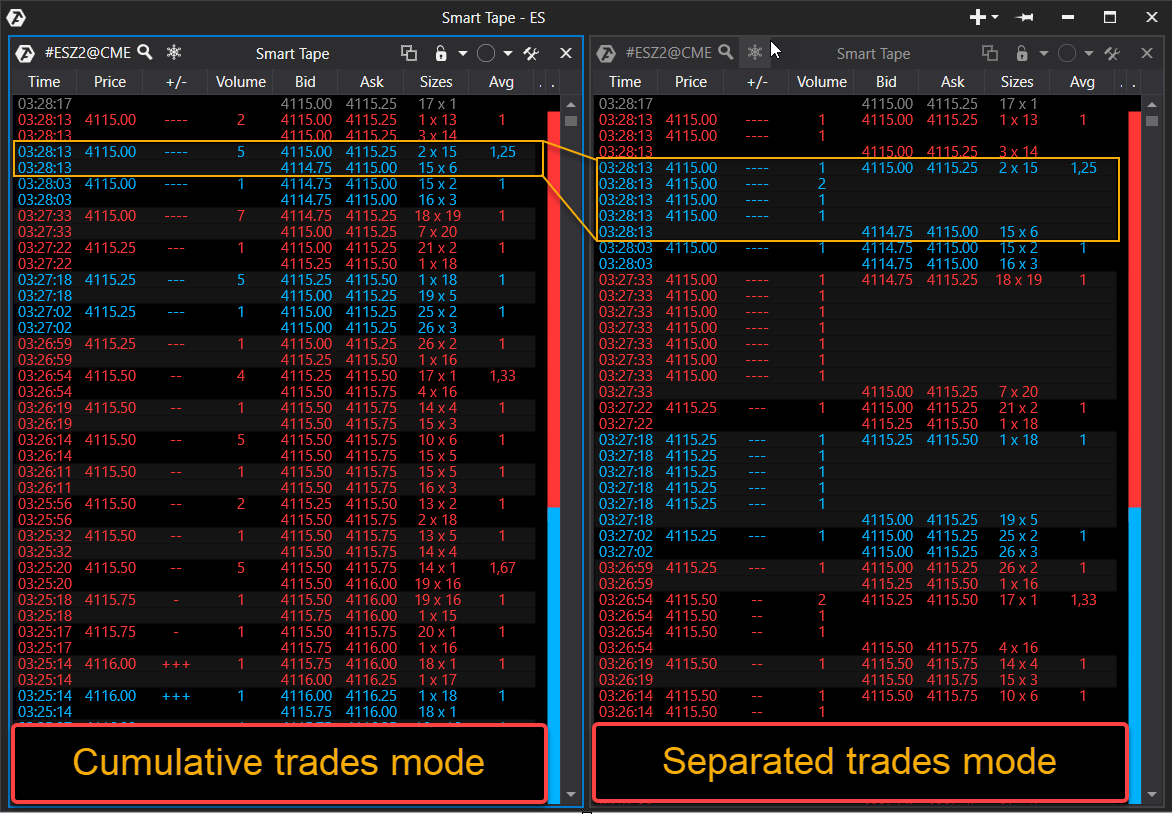
In the classical variant of the widely famous instrument, a trader sees an order flow divided in parts (e.g., one market order of 100 lots might be displayed as a 100 separate prints). Such a display method makes it almost impossible to read the tape because of the high quantity and speed of prints, that is the reason why there are so few people capable of reading the tape.
The main advantage of the ATAS Smart Tape is an opportunity to group the received ticks (large quantity of separate limited prints) in such a way that the trader sees the market orders in their full volume.
A flexible filtering system allows you to highlight different types of volumes. Now you can see what traders with different capitalization are doing at any time.
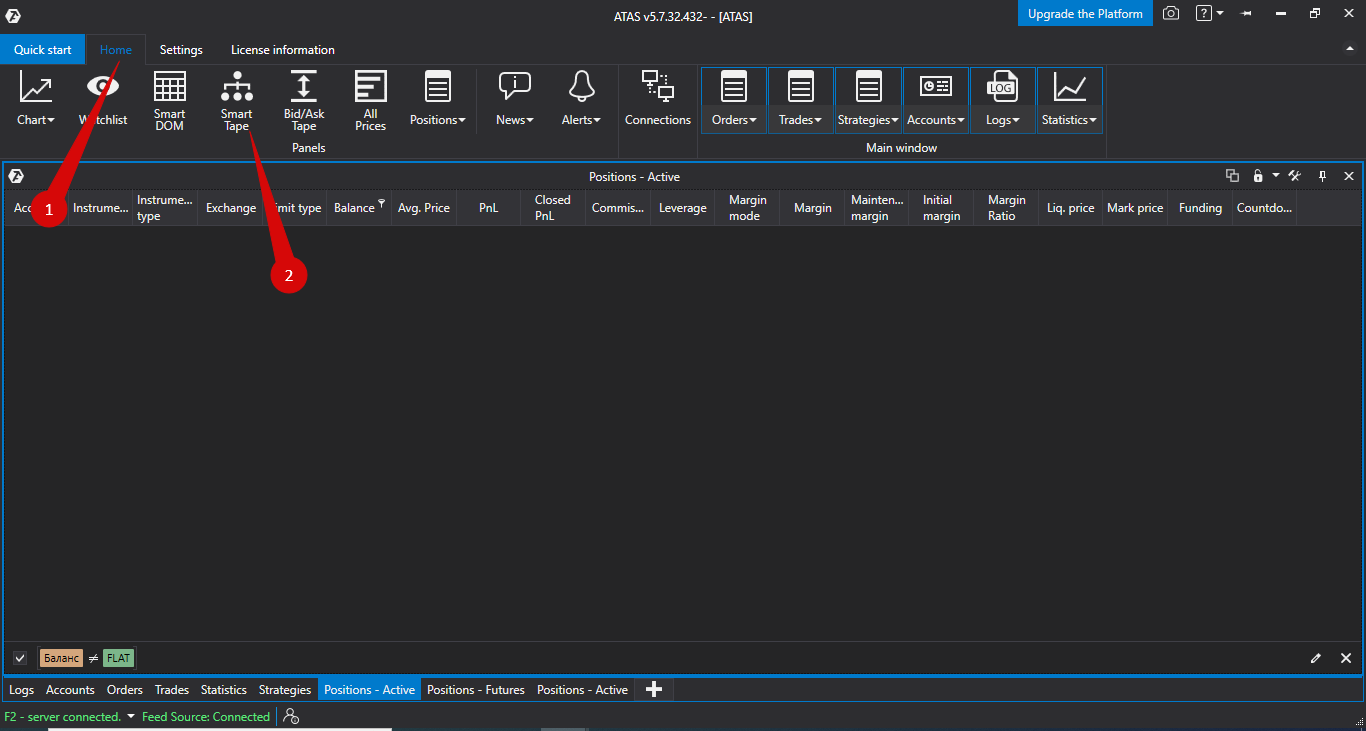
To open this module, use:
1. Smart Tape Hot Key button.
2. Open menu, Smart Tape tab.
The Instruments manager will open next:
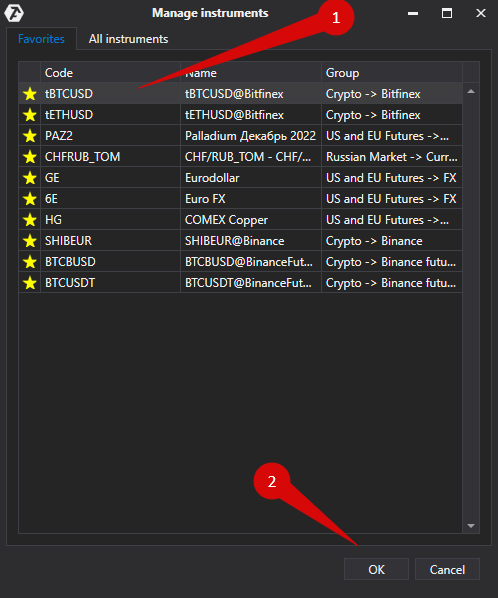
In the following window, choose the instrument from a list in the All Instruments tab or from a list in the Favorites tab.
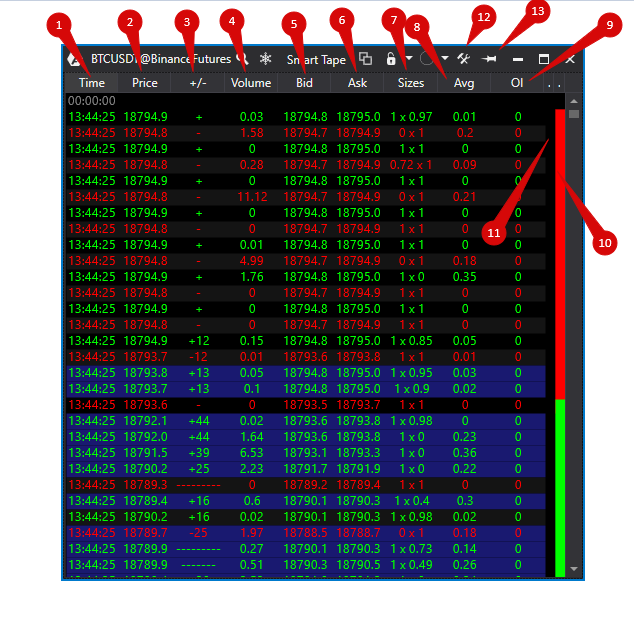
1. Time – time of the trade execution.
2. Price – price the trade was executed at.
3. +/- UpTick &DownTick correspondingly*.
* They are determined based on the previous trades prices (different from the last one). Pluses and minuses (and the numbers next to them) show the number of successive Up/Down ticks.
4. Vol – volume of trades.
5. Bid – the best price of buy after the trade.
6. Ask – the best price of sell after the trade.
7. Size – sizes of Bid and Ask correspondingly after the trade (for Russian instruments this data is not synchronized with the market).
8. Avg – average volume of a print in a trade.
9. ОІ – displays a change in Оpen Interest (for Western instruments, this column will be displayed as zeros, more details here).
10. An indicator of buy/sell strength.
11. Speed – an indicator of the tape speed.
12. Smart Tape Settings.
13. Display the tape above other windows.
* MM – Market Maker or ECN.
*The MM column is not displayed on the following image, but it can be set up via the context menu.
To invoke the context menu, right-click on the tape:
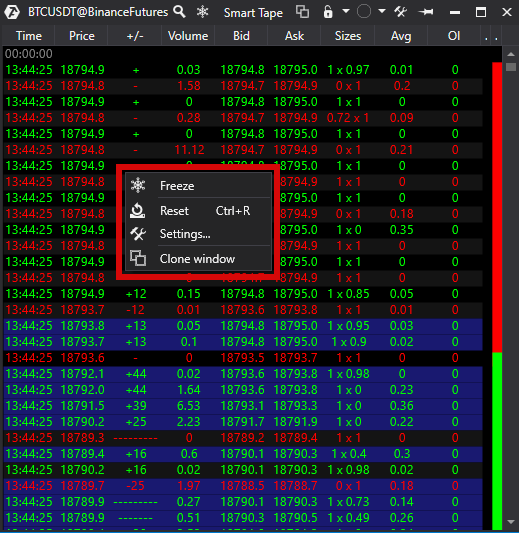
Freeze - allows to “freeze” (stop) the tape (the same button “unfreezes” it).
Reset - reset the window.
Settings - open the tape settings window.
Clone window.
* The tape also has the option to set up the order of the columns (left-click on the column name and without releasing drag it to the desired area of the window) and their width (also with the help of the mouse).
Let’s take a look at the tape settings: for this, in the context menu, choose Settings, after which the Tape Settings window will open.
The following window has 4 tabs with settings:
Visual Settings.
Filters.
Alerts.
Templates.
*To activate the settings, click the Apply button.
To save, click the Save As Default button.
To end the setup, click OK.
Let’s take a look at the tape settings in more detail:
Visual Settings.

Colors:
Background - A color setting of the background.
Alternative Background - A color setting of the alternative background.
Header Background - A header background color setting.
Header Foreground - A header forgound color setting.
Header Text Color - A header text color setting.
Indicator speed tape - A speed tape indicator color.
Above Ask and Below Bid – this color setup allows highlighting the background of the trades at prices higher than the Best Ask and lower than the Best Bid in the tape.
Buy Color and Sell Color – a color setting of the buy/sell display.
Between color – with the help of the following color setting, it is possible to change the display of the trades’ background in the tape (for trades executed inside the spread).
Font:
Font Size. Set the font size in the tape.
.
Volume visualization:
Minimize volume values - minimizes volume values, e.g. the value of12345will be shown as12k .
Digits after the decimal point - set the number of digits after the decimal point.
Other:
Price Digits – number of decimals in the price (value 0 turns off this option).
Show milliseconds (in the Time column).
Rows Height.
Show Previous Level 1 Data –display Level 1 data (Best Bid and Best Ask from the DOM). When this option is enabled, the volume will not be displayed since the trade was not yet executed.
Speed Interval.
Buy Sell Indicator.
Buy/Sell indicator interval.
Current BestBid/BestAsk.
Show - enable/disable current BestBid/BidAsk.
Color.
Filters.
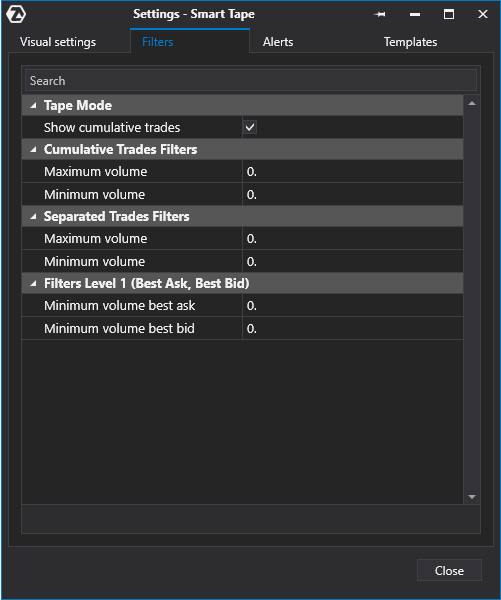
Tape Mode
Show Cumulative Trades – the following option allows to set up the display of the aggregated trades. If this option is disabled, all prints are displayed separately.
Cumulative Trades Filters.
There is a possibility of filtering by volume, which allows determining market players with different capitalization. Value 0 in the parameter of the maximum volume means infinity.
Maximum Volume.
Minimum Volume.
Separated Prints Filters.
This filter allows you to highlight individual prints in the specified range. Without the cumulative trades mode (combining separate prints to display the actual size of the market trades), large prints occur rarely, which means that a large market order will be completely or partially executed by a large limit order in the DOM. Thus, this filter can reveal large limit orders that have been executed. Value 0 in the maximum volume field means infinity.
Maximum Volume.
Minimum Volume.
* The following filter works only when the cumulative trades mode is disabled!
Level 1 Filters (Best Bid/Ask).
This parameter filters prints whose Level 1 (Best Bid/Ask) values were higher than the specified values.
Minimum Volume Best Ask.
Minimum Volume Best Bid.
Alerts.
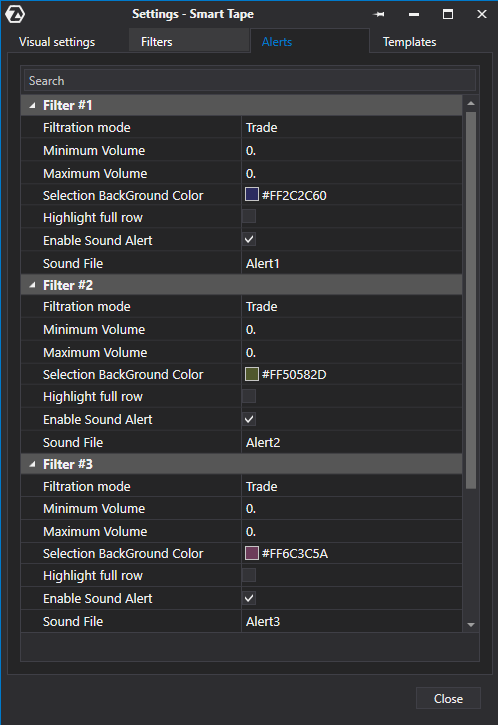
Filtration mode – allows to filter the trades using 6 modes:
- Cumulative Trade
- Bid
- Ask
- Best Bid
- Best Ask
- Best Bid/Ask
Maximum Volume.
Minimum Volume.
Ability to filter the trades in the tape by volume (i.e., if a trade of a specified volume range occurs in the tape, a sound alert will sound).
Selection BackGround Color/Sound File – the ability to additionally highlight the volume filtration by the color settings.
Highlight full row.
Enable Sound Alert.
Sound File – in the directory, where the platform is installed, there is a sounds folder, which contains audio files.
*To install the desired sound file, just copy the name of the file and insert it into the Sound File window.
*Additional information on setting up alerts in the ATAS platform can be found here.
Templates.
The ATAS platform has the ability to save your tape settings into the templates.
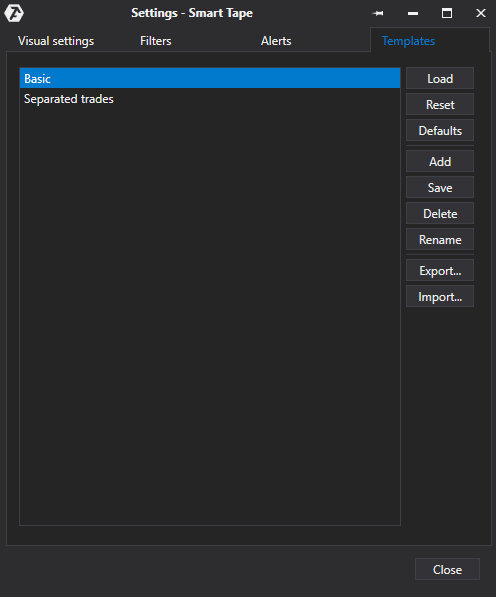
To save the template as a screenshot/snapshot:
- Click the Add button.
- Enter the name of the template in the field that appeared.
- Click Save.
- Click Ok.
Also read the following related articles:
GETTING ACQUAINTED WITH ATAS. ADVANTAGES OF WORKING WITH INDICATORS
SETTING UP AND INTERPRETING THE SMART TAPE
5 BEST INSTRUMENTS TO FIND ‘MANAGED MONEY’ IN ANY MARKET. SETTING AND EXAMPLES.
Was this article helpful?
That’s Great!
Thank you for your feedback
Sorry! We couldn't be helpful
Thank you for your feedback
Feedback sent
We appreciate your effort and will try to fix the article