After launching ATAS, the main program window opens:
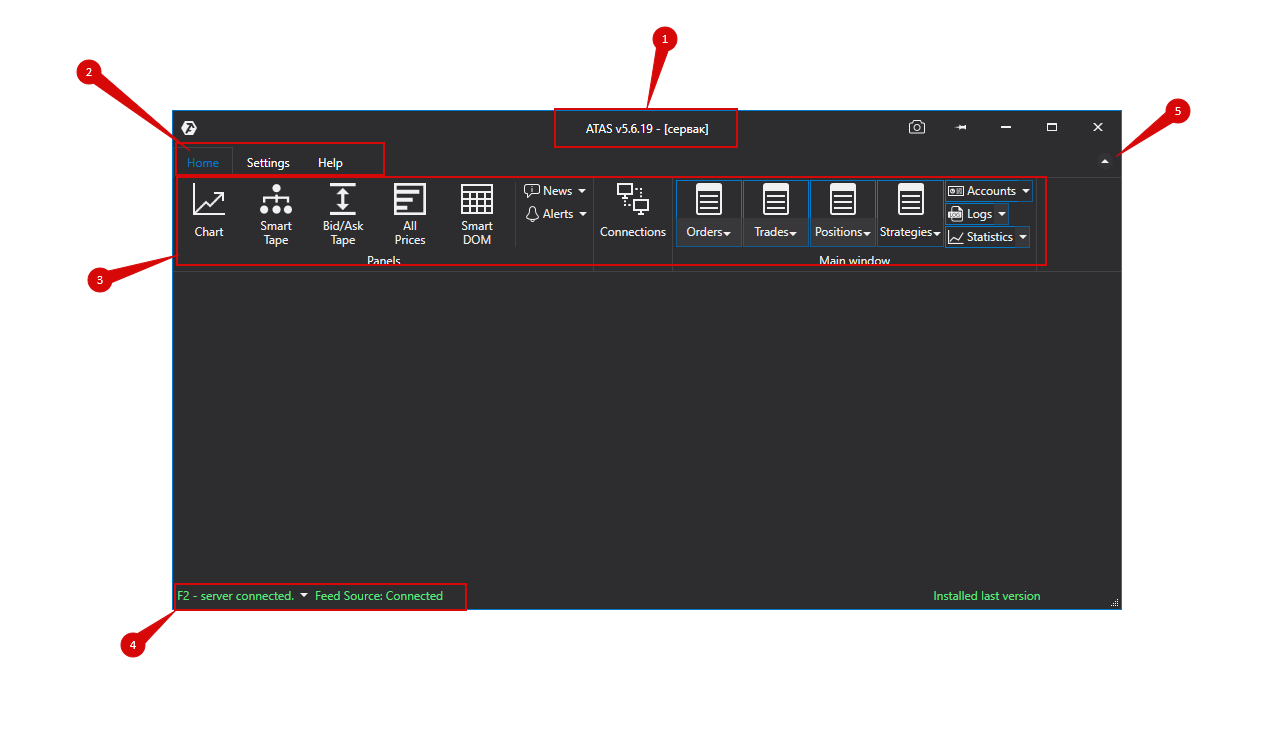
- The name, version of the program and the name of the loaded workspace.
- Tabs menu.
- Tape with quick access buttons to the main windows of the program.
- Status bar which shows:
- server connection status,
- connection status to the data source.
- version relevance indicator
- Tape minimisation button.
- Screenshot
- Support
- Switch between languages
- Topmost
TheQuick Startbutton opens a gallery of recommended templates. You can find more details about this module here.
Let s have a look at the contents of the “Home” tab, it consists of the following elements:

A button for plotting a cryptocurrency pair. It supports many tools from 10 popular exchanges.

This module serves to monitor the market, a large number of instruments at the same time. Below is a brief description of the Watchlist module.

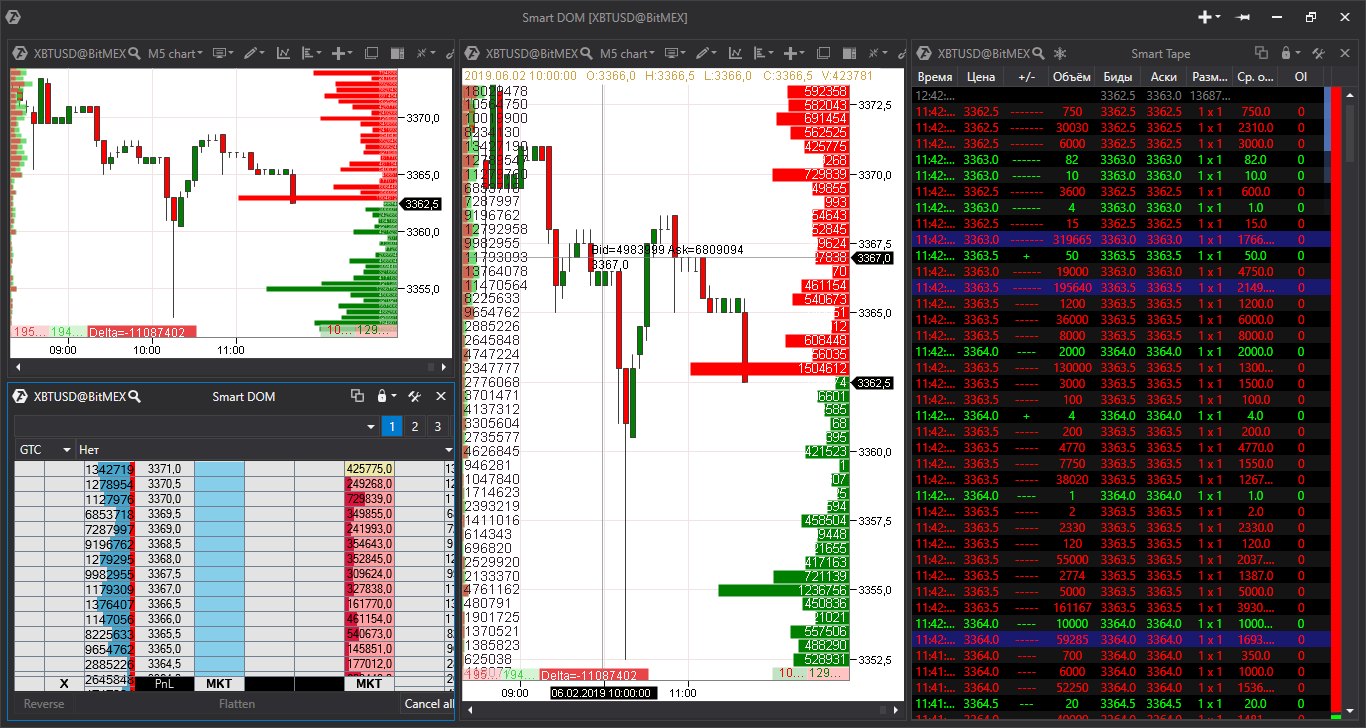
The Smart DOM for trading. Track changes in orders that have been received by the exchange but haven t been executed yet. Scalp in a separate window or make it part of your workspace.

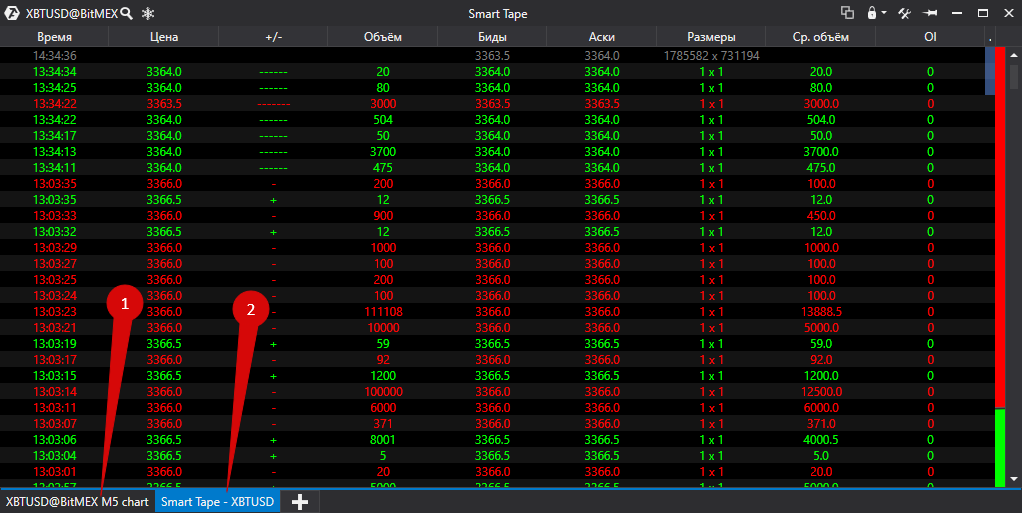
Universal powerful tool for tracking the flow of orders executed with flexible filters and settings.

An instrument for the visualisation of volumes at each spread value.

In fact, it is complete decoding of horizontal volumes.
- • The number of transactions, the amount of volume - all the details for each level.

The Positions tab is related to the Statistics Module.

Keep track of headlines without interruption from the trading and analytical platform.

“I can hear something ringing, but I don’t know where it is,” that is what you used to say when hearing a notification sound that you set. If your strategy uses a lot of alerts in different markets, the triggering of the signal may lead to confusion and a quick manual search for the schedule on which the signal is triggered. The “Alerts” button eliminates this annoying inconvenience. This window captures all the information about the signals that have been triggered - where, when.

A window for setting up connections to quotes and trading accounts.

All information about your portfolio. Complete information for money management.
Consider the contents of theSettingstab, which consists of the following elements:

It opens a window for creating, editing, saving, loading, importing and exporting workspaces. You can use separate configurations for different strategies.

It opens the layouts selection window.

Layouts settings. It opens the working layer settings window. It is used to create, edit
and delete working layers in their list.

Switch between dark and light themes in one click.

Here you can set up sounds for certain events.

Buy by pressing just one button. Sell by pressing another one. Turn your keyboard into a quick way to send orders to the exchange with just one tap.

This function is needed to fine-tune the time of trading sessions on various exchanges and each instrument separately.

This module is used to adjust the display of time on the ATAS platform.

This setting is required to ensure the correct display of your net financial result taking into account commision fees for a trade.

Let’s have a look at the content of theLicense informationtab, it consists of the following elements:

Copyright information, privacy policy, risk warning and information about third-party software developments used in the platform.
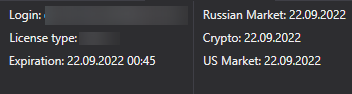
Information about the user license and its expiration date.
A multi-window system has been added, it looks like this:
- open any number of charts, smart tapes, DOMs and other tools
- drag them on the screen in any desired direction
- the program automatically “sticks together” windows into a single workspace
- move the bordes between the components of the workspace for more precise adjustment. Save not only space on the screen but also your time and attention.
To form it this way, drag one window on top of another and you will see a selection element that allows choosing where togluethe window:
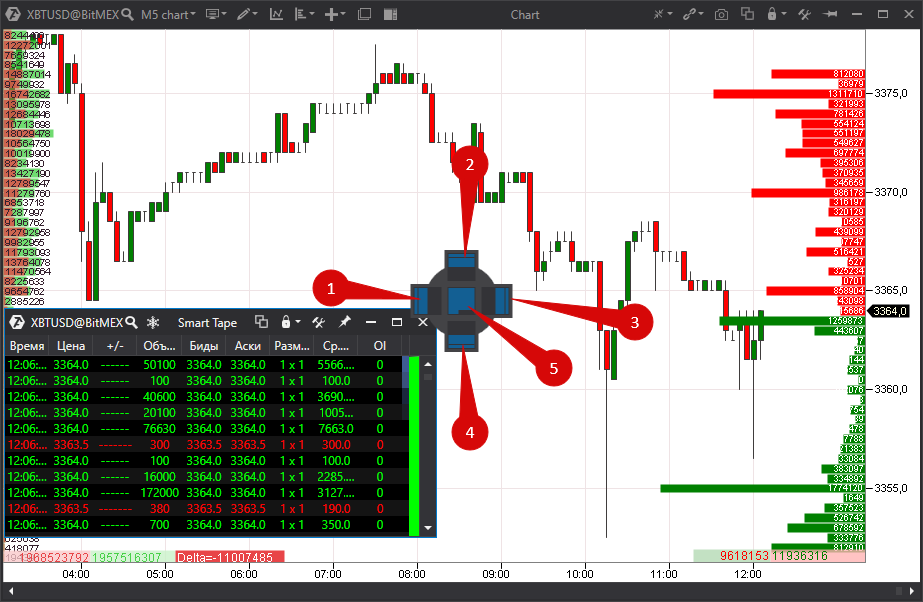
- The window sticks to the left.
- The window sticks to the top.
- The window sticks to the right.
- The window sticks to the bottom.
- The window will overlap the existing one, and tabs for switching will appear at the bottom.
The last option is as follows:
Was this article helpful?
That’s Great!
Thank you for your feedback
Sorry! We couldn't be helpful
Thank you for your feedback
Feedback sent
We appreciate your effort and will try to fix the article