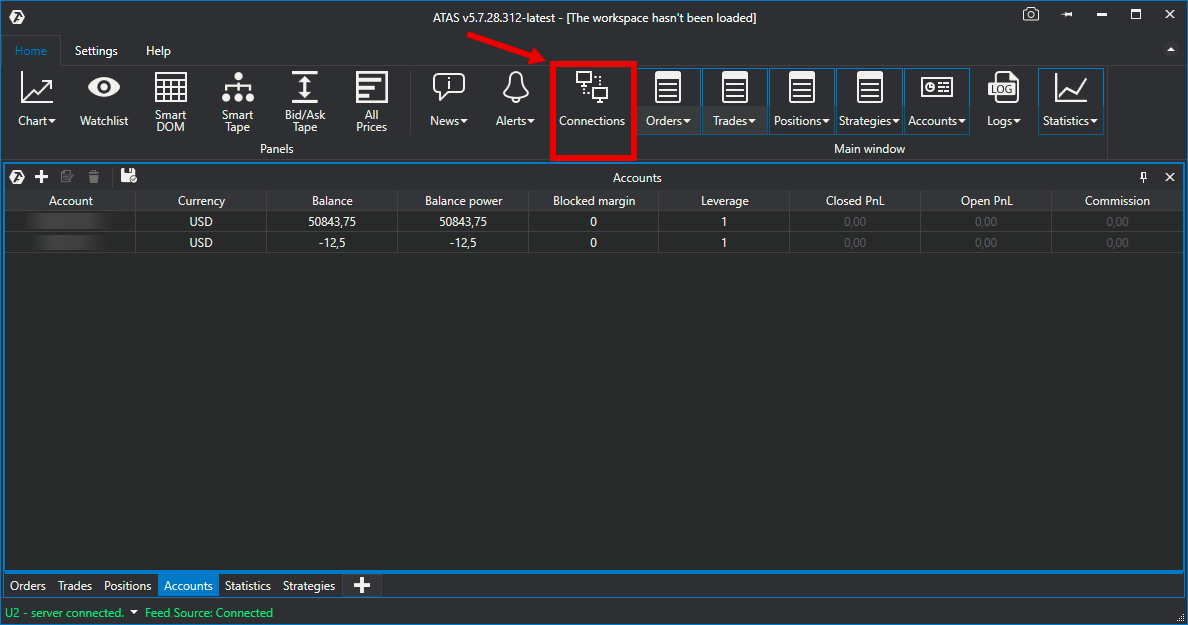
To configure the Exante connection to the ATAS platform, enter the menu of the main window of the ATAS platform and left-click on the item Connections in the main window of the platform.
Then, the following window will open:
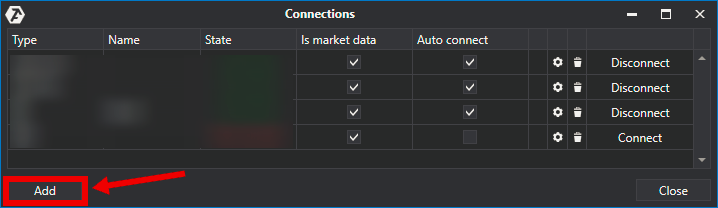
To add a new connection, click the Add button.
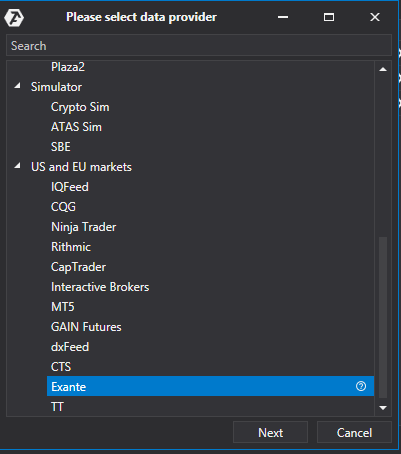
In this window, you select the Exante connection type and click Next button.
Next, a window opens for the signing of the agreement:
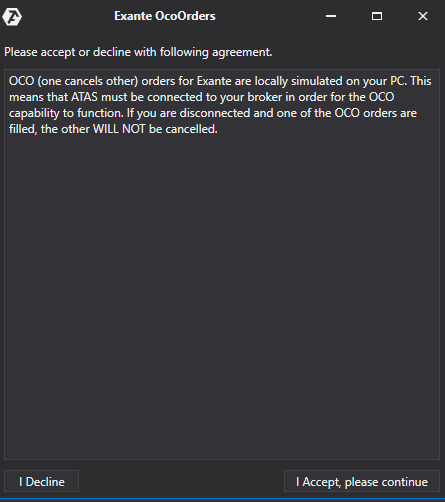
OCO (one cancels other) orders for the Exante connection are locally emulated on your computer. This means that the platformmust be connected to your broker for OCO orders to function properly. If youare disconnected and an OCO order is filled, the other orders of the same groupWILL NOT BE CANCELED!
If you are agree, click I Accept, Please continue.
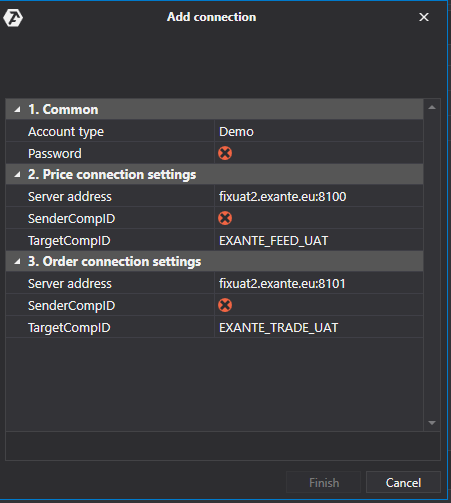
1. On the Account type - Select the type of account - real or demo
If the broker sent data like fixprod(ln|ld4|eu|dsp|ny|usa).exante.eu:27001, then you need to enter only part of it, for example fixprod.exante.eu:27001 orfixprod.exante .usa:27001
4. Logging level - logging level selected by the user ! The choice of the level depends on the degree of technical detail of the information to the merchant server is displayed in the logs. 4 logging levels are available:
- Debug
- Info
- Warning
- Error
* After setting up the connection appears as a separate line in the terminal window:
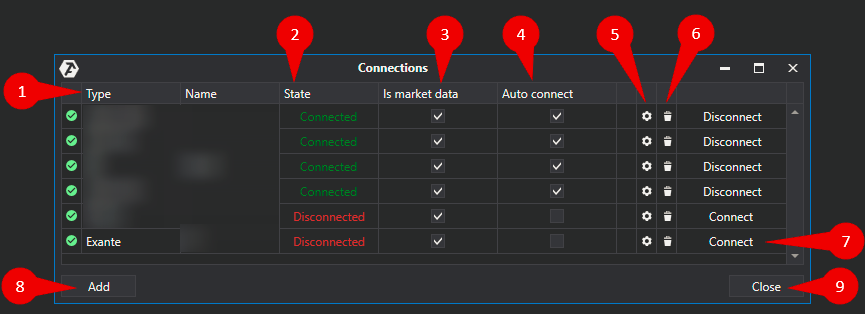
1. Type - Connection source.
2. State - After adding a new connection, its default status is Disconnected. To connect, click the Connect button.
3. Is market data - Option to select a quote provider.
4. Auto-connect - If you want the connection to occur automatically when the platform starts, then you must enable this option.
IMPORTANT! Only one quotes scource must be connected for Russian and US markets!

5. Connection settings button.

6. Delete the connection button.
7. Connection enable button.
8. Button for adding a new connection.
9. Logout button.
Was this article helpful?
That’s Great!
Thank you for your feedback
Sorry! We couldn't be helpful
Thank you for your feedback
Feedback sent
We appreciate your effort and will try to fix the article